
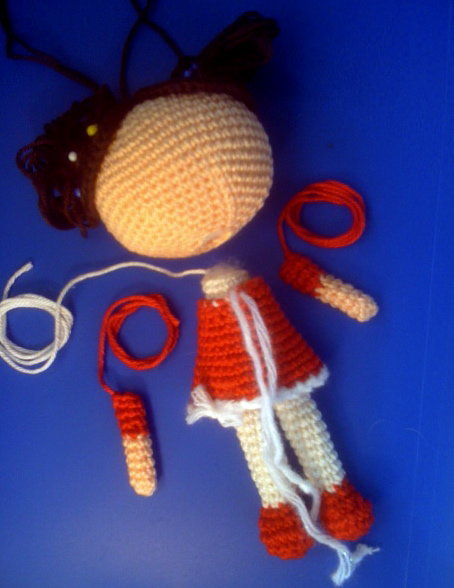
These three dolls were one of my first attempts when started crocheting dolls. Experimented a lot with different head shapes, hair styles. BB dolls came out of these little ones.


 Have ben asked recently more than just few times for the pattern on how to make these dolls. Instead of writing separate mails and sending them, decided to share the pattern for all and make it available as all of my patterns so far.
This one is really easy and fast to do. For those that have tried making BB dolls will see that only the shape of the head and hair is different.
Suggest you work with fine cotton yarns (DK to be the maximum weight to use), together with 2-2,5 mm hook (depending what yarn you will work with).
Dolls are small, only 5 inches (12 cm) tall, and were created as pocket or girl back pack/bag dolls. Ones girls can carry all around.
I don’t have all the photos made to show you all of dolls I have made in such way, but they turn out when crazy colors are used for hair; like green, pink, purple. It gives them this bright and cheerful appearance that girls like very much.
Let us start with the pattern (so you can get started making them )!
Abbreviations (US terms):
R – round
ch – chain
sl st – slip stitch
sc – single crochet
st(s) – stitch (stitches)
inc – increase (two stitches in one stitch)
dec – decrease (invisible decrease or two stitches together – I used invisible decrease making these dolls)
** – repeat what you find between
HEAD
Ch6
R1 Sc4, 3sc in one stitch, continue working around chain – sc3, 2scin one stitch (12 sts)
R2 *inc1, sc1* x6 (18 sts)
R3 *inc1, sc2* x6 (24 sts)
R4 *inc1, sc3* x6 (30 sts)
R5 *inc1, sc4* x6 (36 sts)
R6 *inc1, sc5* x6 (42 sts)
R7 *inc1, sc6* x6 (48 sts)
R8 sc48 sts
R9 *inc1, sc7* x6 (54 sts)
R10-R13 sc54 sts
R14 *dec1, sc7* x6 (48 sts)
R15 sc48 sts
R16 *dec1, sc6* x6 (42 sts)
R17 *dec1, sc5* x6 (36 sts)
R18 *dec1, sc4* x6 (30 sts)
R19 *dec1, sc3* x6 (24 sts)
R20 *dec1, sc2* x6 (18 sts)
start stuffing the head at this point.
R21 *dec1, sc1* x6 (12 sts)
Tie off, finish stuffing the head nice and firm
HAIR
In the photos below, I made sample of two same size hair pieces, placing them evenly on each side of the head. You can play and make them differently. You can make one bigger, the second one smaller making hair look as combed on side. You can make one big one on top of the head with pony tails on each side or just one on top of it. It is really up to your wishes, likes and desires.
Here is just a sample on how it goes for you to understand on how to play later.


Hair is done out of two “discs” and two tessels.
Discs (make2):
Ch6
R1 sc4, 3sc in one st, continue working around chain, sc3, 2sc in one st (12 sts)
R2 *inc1, sc1* x6 (18 sts)
R3 *inc1, sc2* x6 (24 sts)
R4 *inc1, sc3* x6 (30 sts)
R5 *inc1, sc4* x6 (36 sts)
Tie off leaving long end for sewing the hair piece on the head later.
Tassels
Proceed shown on the photos.
I used an old embroidery thread cardboard, that was about 3 cm wide (1,3 inches) to make a tassels. So before everything cut a piece of cardboard of desired length to use to make tassel.


Once you prepare the cardboard or anything you can wrap your yarn over, wrap the yarn over the “tassel maker” 30 times (less or more… depends on how thin or thick your yarn is or how you want your tassel to look). I wrapped 30 times.
Cut the yarn leaving long end and thread the needle (as seen in photo above).
Now what you have to do is push the needle through the middle of wrapped yarn (close to cardboard you go). Once gone through, make a knot you will tighten when pulling the yarn.


Now take the tassel of the cardboard and make few more knots like this, pushing through the middle of the tassel, making knot and pulling.
Once done, you will see your tassel becoming firm at the end where you have sewed. Now try to push the needle through the yarn on top of the tassel (one you sewed while making knots). make three-four knots on top of it.
 Your tassel is finished and ready to be sewed on head now.
If you will find it difficult to follow (because I am very bad describing and specially bad taking photos) please try to google on how to make tassel in order to find instructions for your better understanding.
Once done with all four pieces, pin them all on the head the way you like and sew all around.
In order to make one big piece of “disc” on top of the head, start making the disc as described in above pattern but increase evenly every round by 6,until you make 54 stitches total count. You can add two more rows 54 to finish the piece and make it fit nicely the head.
For one bigger one smaller; start as described in the pattern above, bigger disc make with last round stitch count 48, and the smaller counting 24 or 30 stitches.
LEGS & BODY
Make legs first, then join them together and continue making body.
Leg1:
Start with shoe color of your choice
6 Sc in magic ring (6 sts)
R1 2 sc in each st around (12 sts)
R2 *2sc in one st, sc1* x6 (18 sts)
R3 sc18
R4 dec6, sc6 (12 sts)
R5 dec3, sc6 (9sts)
Stuff the bottom of the leg.
Change color of the thread and continue with R7.
R6-R15: sc9
Tie off; stuff the leg.
Repeat the same for Leg2
Body
At this point stuff the leg and bring both legs together. Fingers/heals pointing same directions.
R16 Stitch all around making 18 stitches around.
R17-24 sc18
R25 *dec1, sc1* x6 (12 sts)
R26-28: sc12
Tie off leaving long end for sewing the body to the head.
Stuff the body nice and firm.
ARMS X2
Sc6 in magic ring
R1-R5 sc6
Change color
R6-R9 sc6
Tie of and leave long end for sewing the arms to the body.
DRESS
R1 Sc18 in magic ring (don’t close the ring completely) or stitch over piece of bow or yarn you can tie in front later
R2-R3 18 sc
R4: *inc1, sc2* x6 (24)
R5-R6: 24 sc
R7: *inc1, sc3* x6 (30)
R8-R9: 30 sc
R10: *inc1, sc4* x6 (36)
R11: 36 sc
Change color
R12: *ch2, skip one, sl st* repeat all around
Tie off and hide ends.
Assembling the pieces together
Put the dress over the body and sew head-body parts together. Add some stuffing between head, body so the head doesn’t flop around. Sew on the arms. When done with body, you can start sewing the hair pieces together. Place and pin discs on top of the head. Sew them nicely all around. Place and pin tassels the way you want them to be and sew them nicely.
Designing the face:
Embroider the eyes or if you are using safety ones place them in between rows 9-10 (embroider over round 10).
Embroider mouth right below round 12.
Your new doll is done! Quick and easy, isn’t it!?
I hope you will enjoy making her and your daughters and granddaughters will love playing with her.
Thank you for staying with me!
Wishing you all wonderful weekend.
Hugs to all,
Vanja
Sweet as can be!!!!! Great gifts for Christmas,,, and yes ,, I plan this far ahead. Thanks so much for sharing your talent with us SMILE Helen
[…] http://amigurumibb.com/2013/11/01/sara-lara-and-sophie-dolls/ […]
You are very talented to create a pattern for these. Someone forwarded this to me to make for them. Would you please show me the recommended yarn to use please? I am fairly new to crocheting and extremely new to amigurmi. TIA.
Hi Nakita,
When making amigurumi, it is the best to follow your instinct and work with yarn you feel comfortable with or ones you can afford or find at your local shop.
When making dolls, one thing you have to keep in mind is to keep stitches pretty tight. That means you work as well as stuffing, later, have to feel firm.
If you find yarn that calls for hook number 3mm, work with number 2. This will keep your work tight and this is what doll requires.
You will also notice that almost every designer works with different yarns, uses different hooks…..and since we all come from different countries, many times it is impossible to find exact brand or yarn designer says to use.
Most of my dolls I make with cotton yarn (light to medium weight) and use hook No 2 (mm).
What I can suggest is you try with something similar I use and see how it works for you. If not satisfied, on your next doll try with different weight yarn and different hook. After two dolls you will know on your own what feels the best for you, and stick with that 🙂
Hope it all helps.